Background
Lets say you have a static site which is either normal HTML/CSS site or a build output from any frameworks like react/angular web frameworks and you want to host this as a static site.
For hosting a static site, we can make use of AWS S3 with combination of AWS Route53 and which is very low cost also
But everytime when we make some changes in our code, we need to push our code into AWS S3 to reflect our new changes.
So, to overcome this problem, we can make use Github Actions and automate our deployment or pushing our code directly into AWS S3 everytime when we push some changes to master branch.
What we will do?
We will automate deployment of static site content directly to S3 using Github Actions and learn setting up CI CD pipeline for doing this.
Resources
Following resources will be using
- AWS S3
- AWS IAM
- Github Actions
Lets move to actual work without wasting much time....
Steps
To achive our end goal of deploying static site using AWS S3, we can divide our blog into two sections.
In the first section we will implement pushing our code into AWS S3 bucket using CI / CD pipeline of github actions.
And in the second section we will configure the s3 bucket to host our site.
Second part can be done using these well explained steps blog by Tiberiu Oprea
So, we will deal here with first section only.
Pushing code into AWS S3 Bucket
In this section we will push our code into aws S3 bucket on every push into master branch.
Step1: Get AWS S3 Bucket Details
Follow below steps
- Login into you AWS console
- Open S3 Service
- Choose your bucket
- Create the bucket if not exists
- lets say we created a bucket with name examplesitebucket
-
Go to properites of bucket and find ARN.
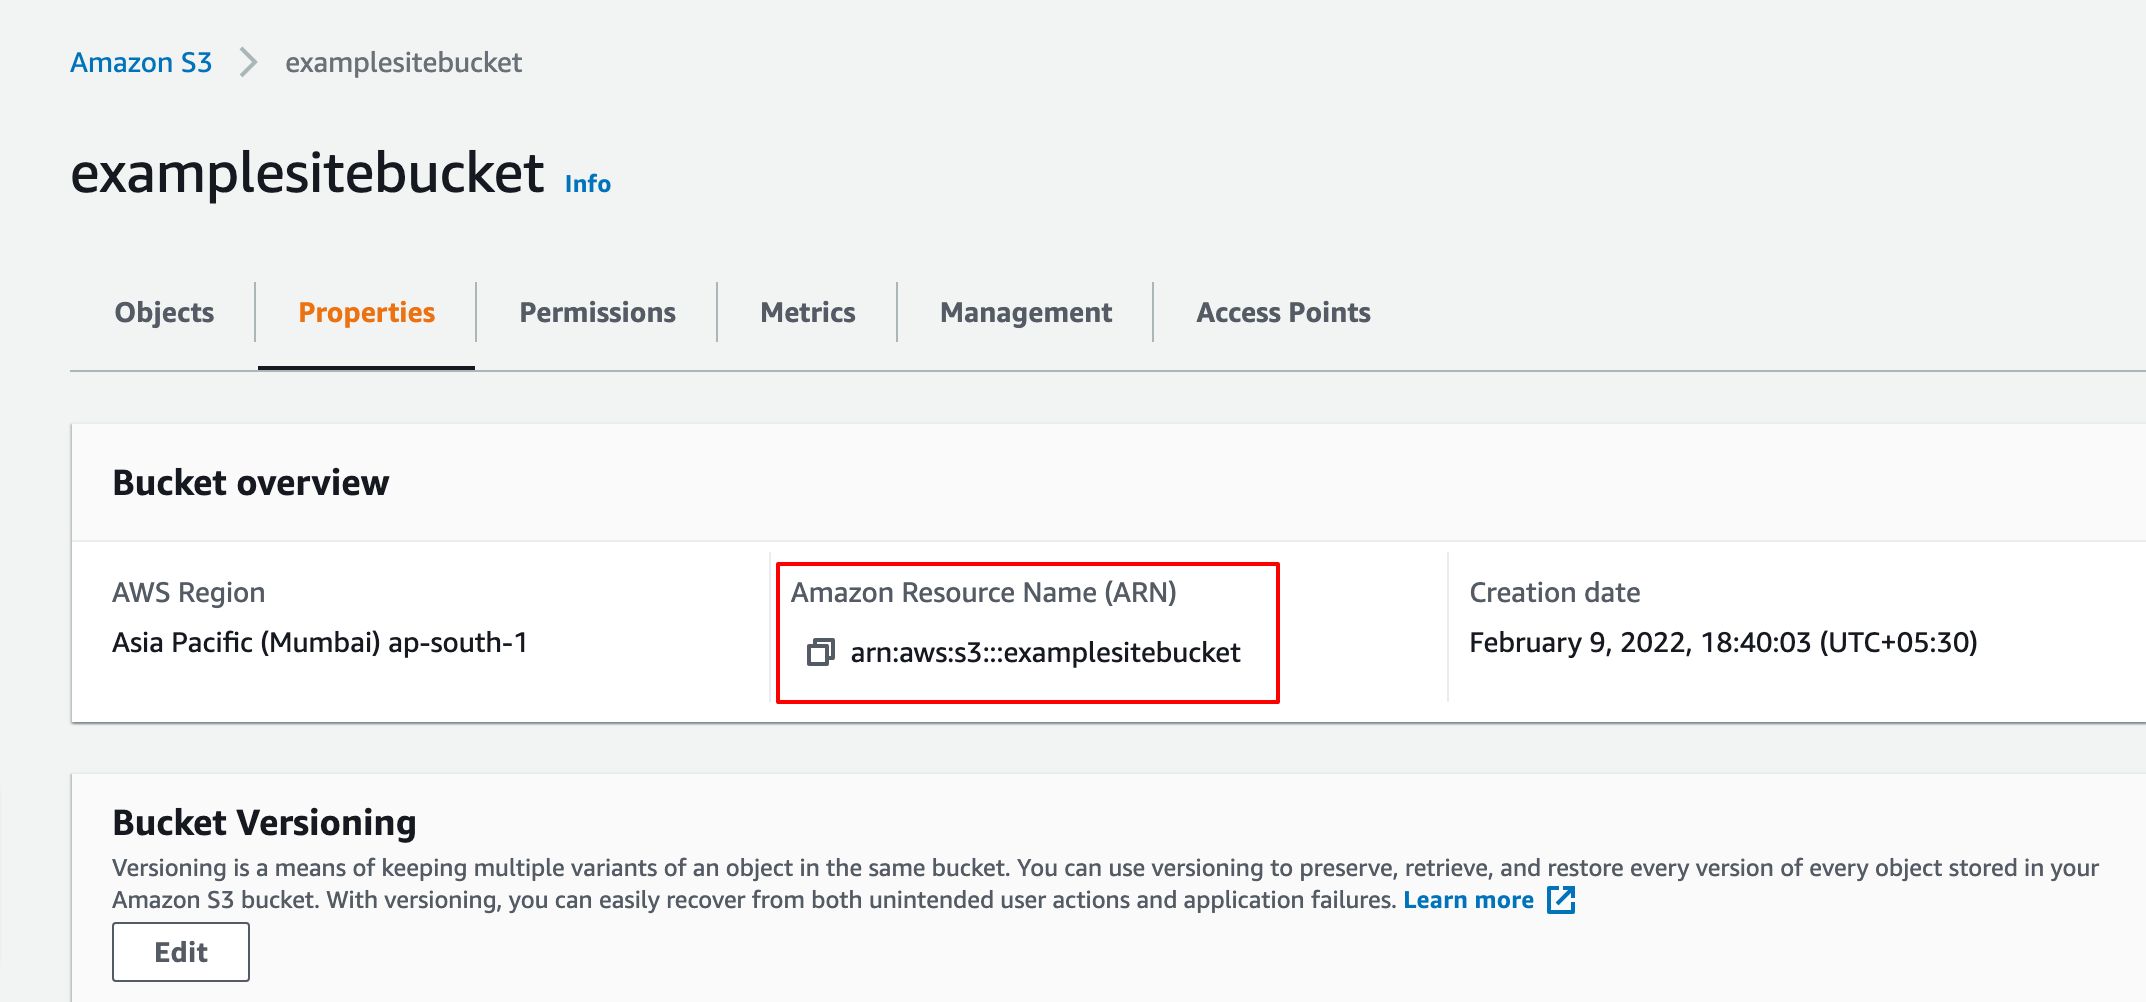
- Please note the bucket ARN for future steps
- for my bucket ARN: arn:aws:s3:::examplesitebucket
Step2: Configure I AM User
We need a authenticated user to push our code into AWS S3. For that we can create a separate AWS user with our required permissions only.
Here we will create a policy with our required permissions and a IAM user
And, attach the policy to the IAM user.
Follow below steps for creating a policy
- Login into you AWS console
- Open IAM Service
- Click on polices count and create policy button

- Go to JSON editor of policy and replace below permission in the editor as
show
in image
As you can see in below permissions, we are granting the policy with S3 read and write access on our bucket.
Note: Make sure you replace bucket details (arn:aws:s3:::examplesitebucket) with your S3 bucket ARN.
-
{
    "Version": "2012-10-17",
    "Statement": [
        {
            "Sid": "VisualEditor1",
            "Effect": "Allow",
            "Action": [
                "s3:PutObject",
                "s3:GetObject",
                "s3:ListBucket",
                "s3:DeleteObject",
                "s3:GetBucketLocation",
                "s3:PutObjectAcl"
            ],
            "Resource": [
                "arn:aws:s3:::examplesitebucket",
                "arn:aws:s3:::examplesitebucket/*"
            ]
        }
    ]
}
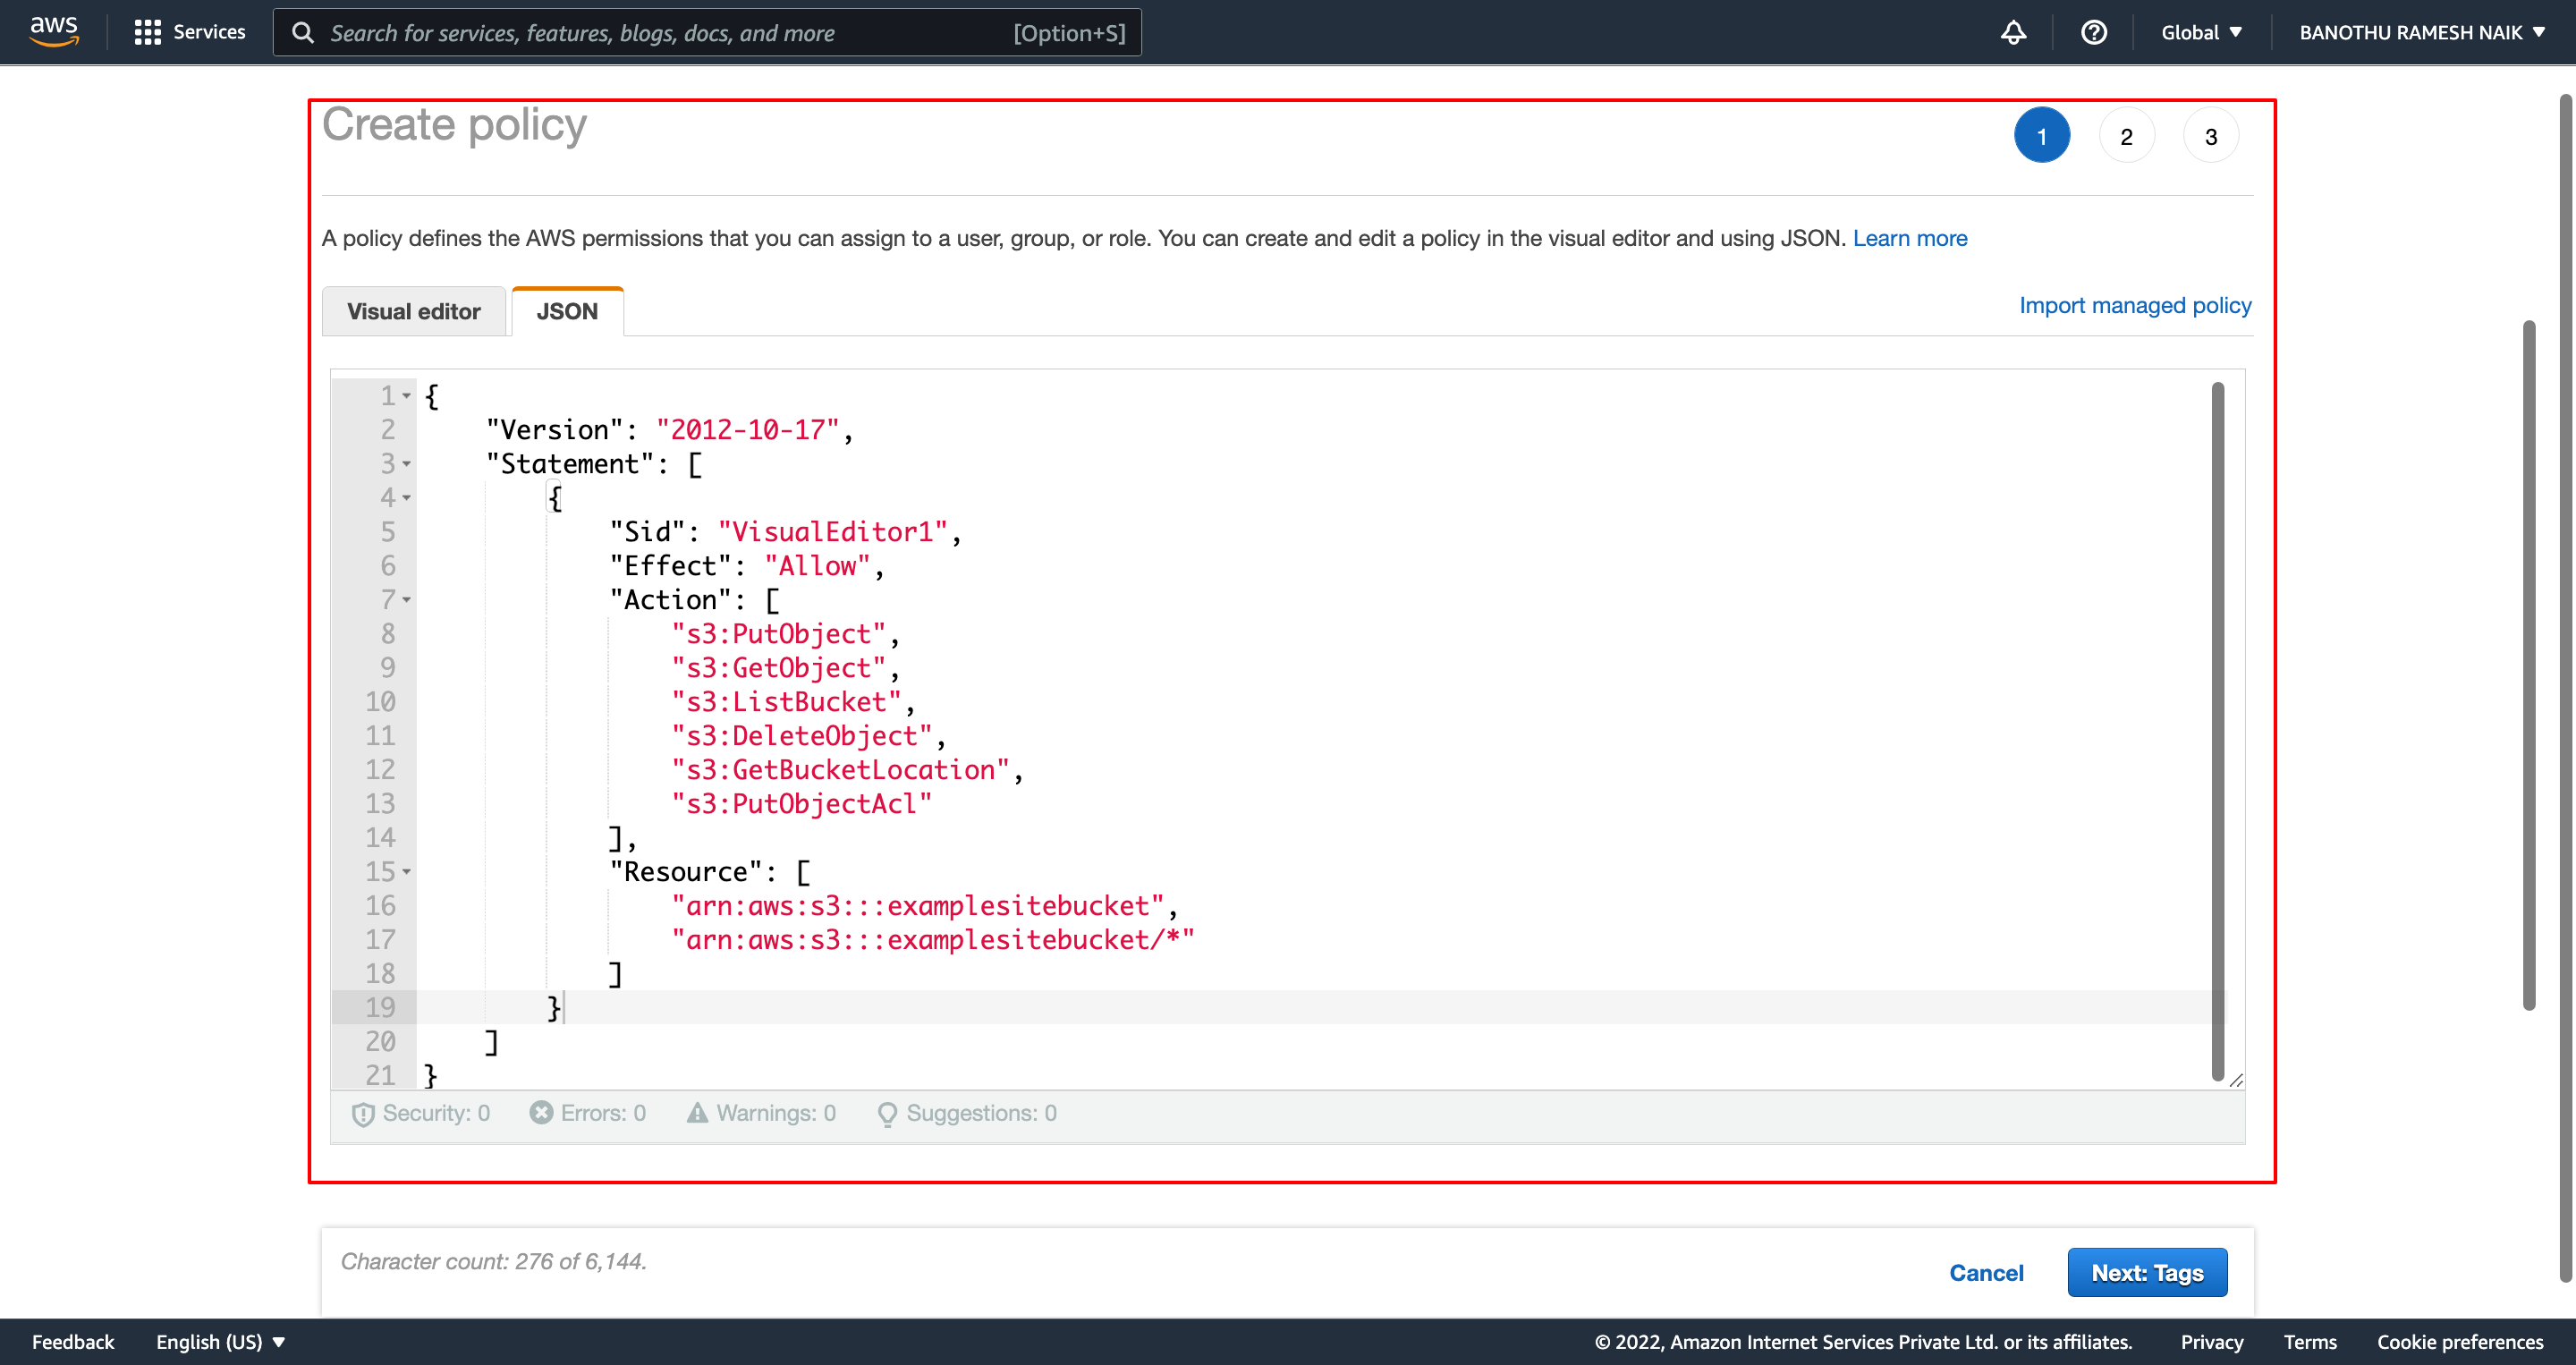
- And then click Next: Tags button at bottom right
- Give a name to the policy in the next step and make a note of it
- For me policy name was tes-push-s3-policy
Now we will create a IAM User
Follow below steps for creating a IAM user
- Login into you AWS console
- Open IAM Service
- Click on users count and create user button
- Give the name to user and mark the checkbox Access Key - Programettic
Access as shown in below image

- And then click on next step
- In the permissions step, we need to attach permissions policy which we created in above step.
- Follow steps given in below image
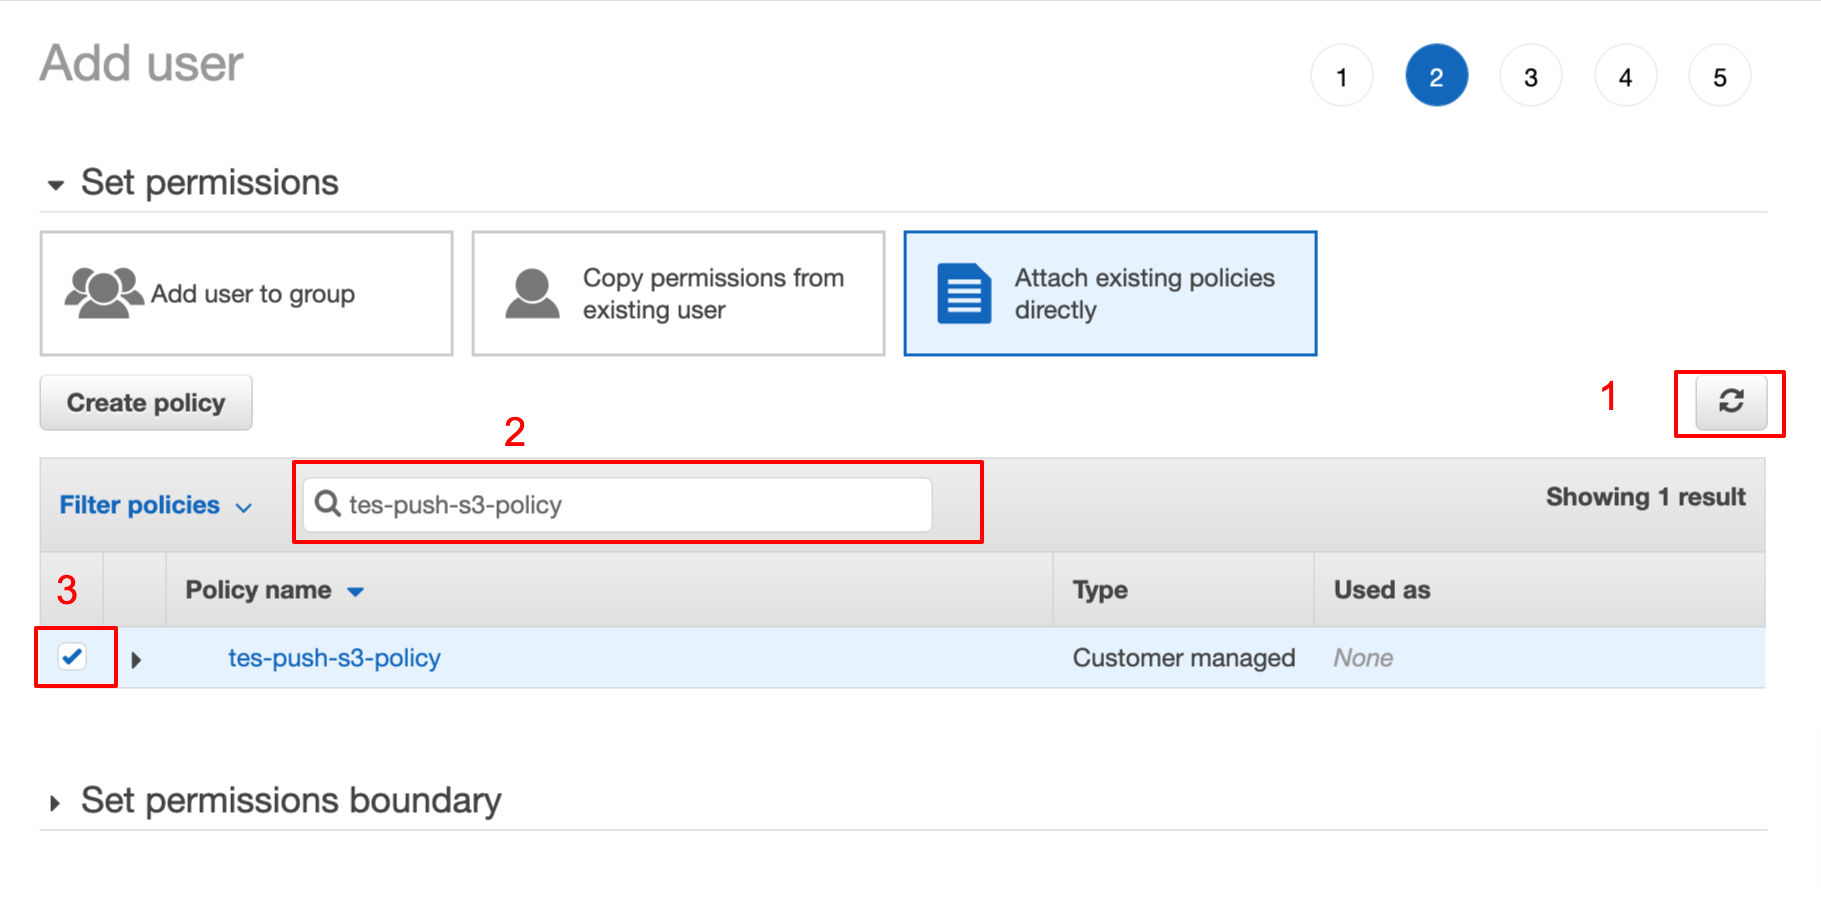
- Click on next step and review the user, make sure policy we created
is
attached to user
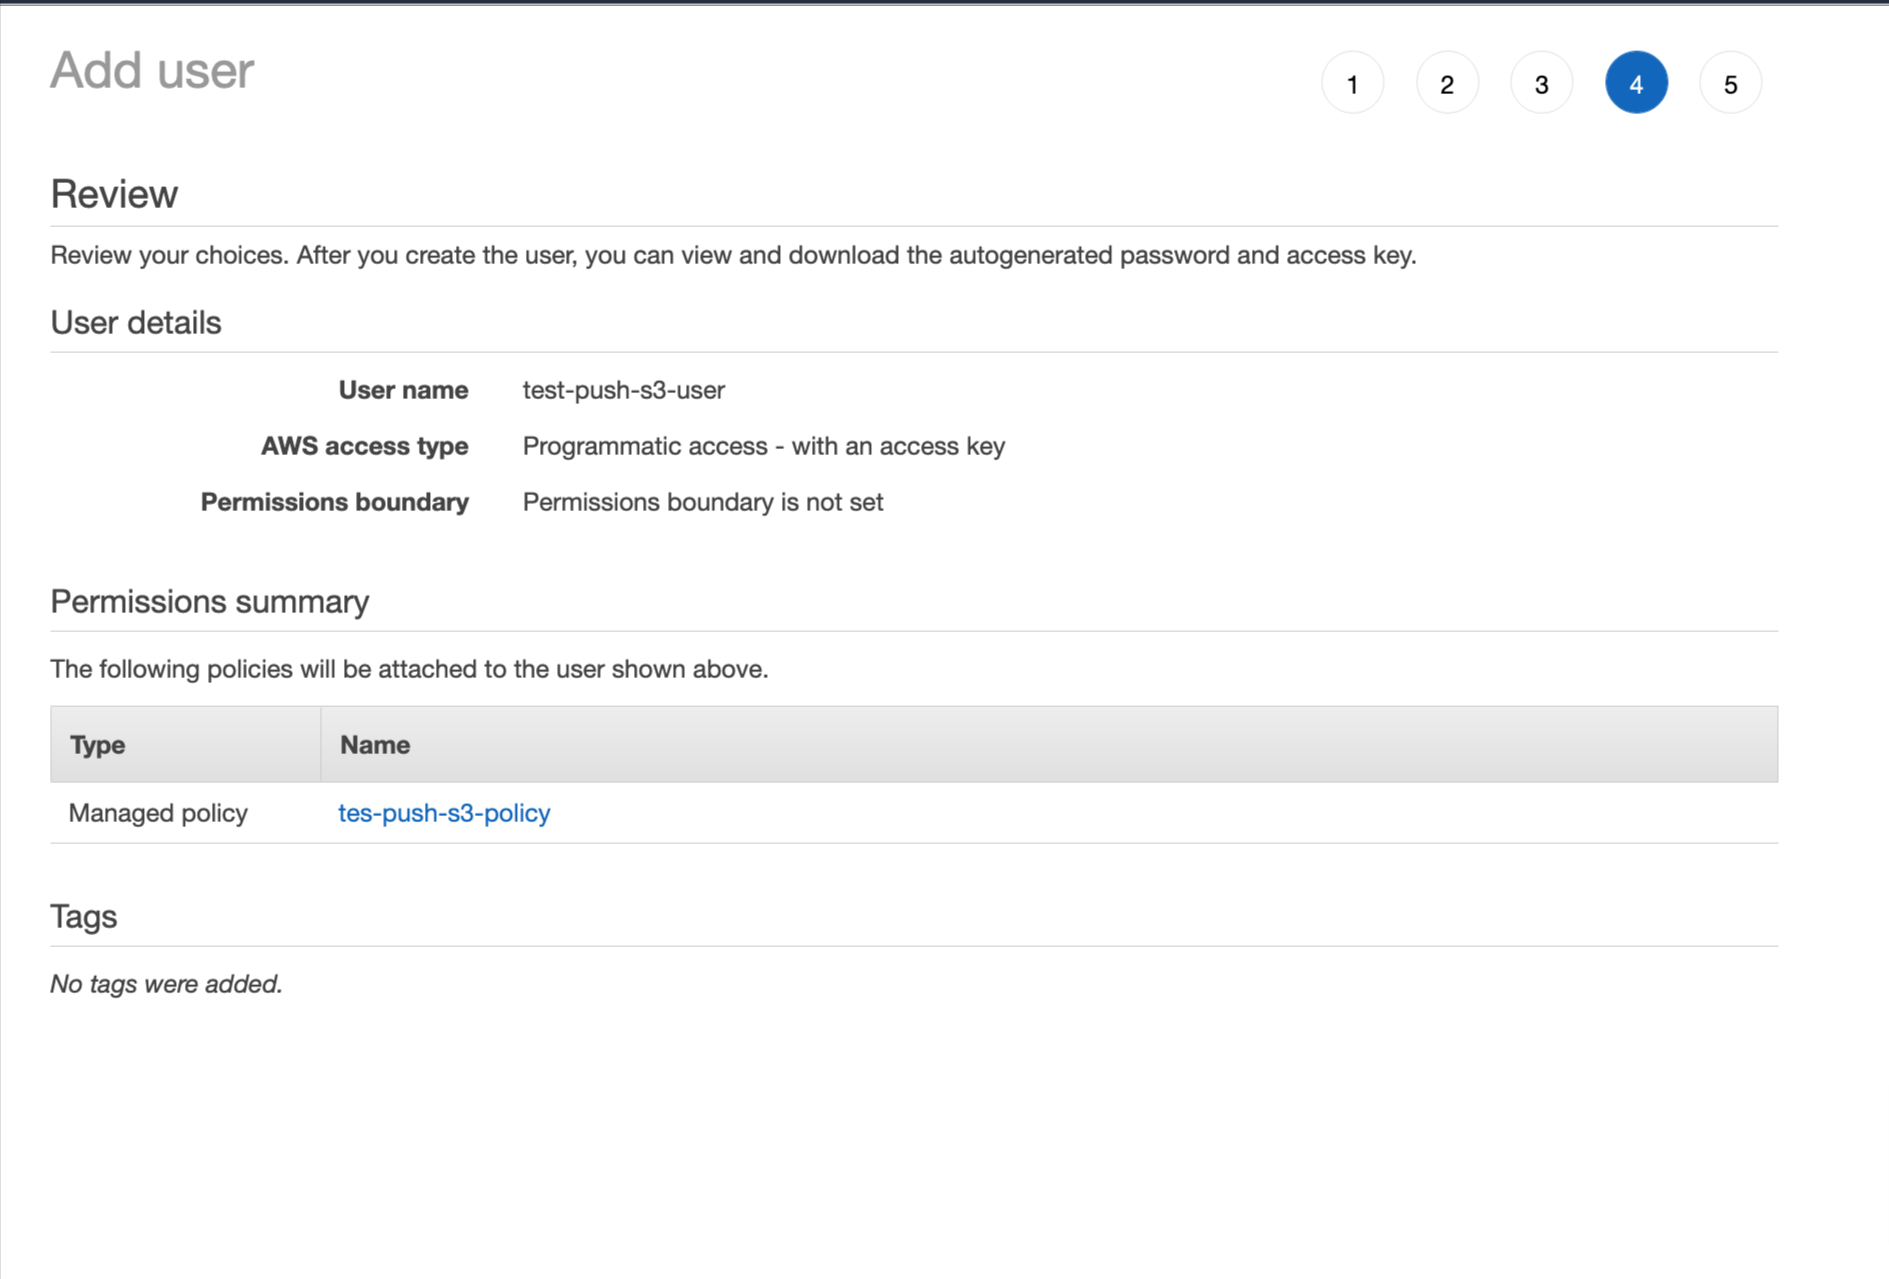
- Click on next step and create the user.
-
Note down the credentials displayed here.
These credentials will displayed only once here and can't be viewed again.
So, Please make sure to download these credentials and keep it as secret.
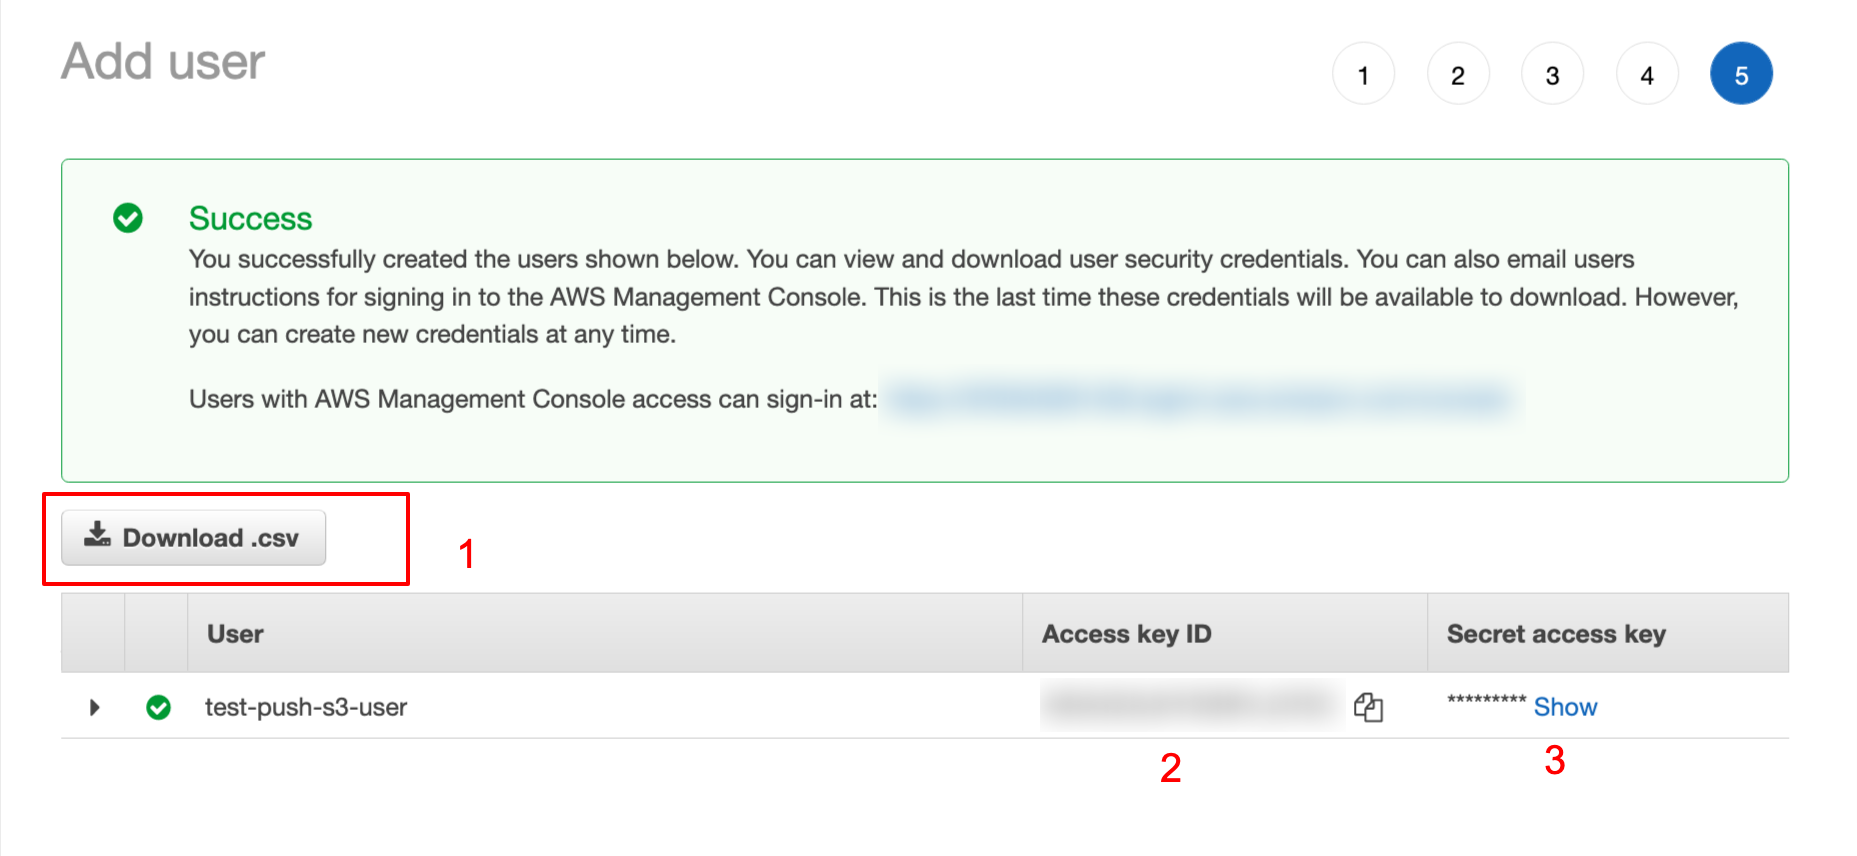
- We need these credentials in the next steps...
Now we will make configurations in our github repo
Step3: Configure Github Actions
Open your repo code and follow below steps
Code Setup
-
Create a file master.yml with following content and save the file in
.github/workflows folder. (Create the folder if not exists :-)
name: Deploy into Server
on:
    push:
    branches:
        - master

jobs:
    push-into-s3:
    runs-on: ubuntu-latest
    steps:
    - name: checkout
        uses: actions/checkout@master

    # Upload to S3
    - name: Upload to S3
        uses: jakejarvis/s3-sync-action@master
        with:
        args: --exclude '.git*/*' --delete --follow-symlinks
        env:
        SOURCE_DIR: './'
        AWS_REGION: 'ap-south-1'
        AWS_S3_BUCKET: ${{ secrets.AWS_S3_BUCKET }}
        AWS_ACCESS_KEY_ID: ${{ secrets.AWS_ACCESS_KEY_ID }}
        AWS_SECRET_ACCESS_KEY: ${{ secrets.AWS_SECRET_ACCESS_KEY }}
As you can see above workflow code, we are running a job on every push into master branch.
Note: You can modify this workflow as per your branch / commits etc and learn more here
Settings Setup
As we can see in above master.yml code, we need three AWS evnironment variables
Since we can't hardcode them into the codebase, we can make use of Github Secrets to store them.
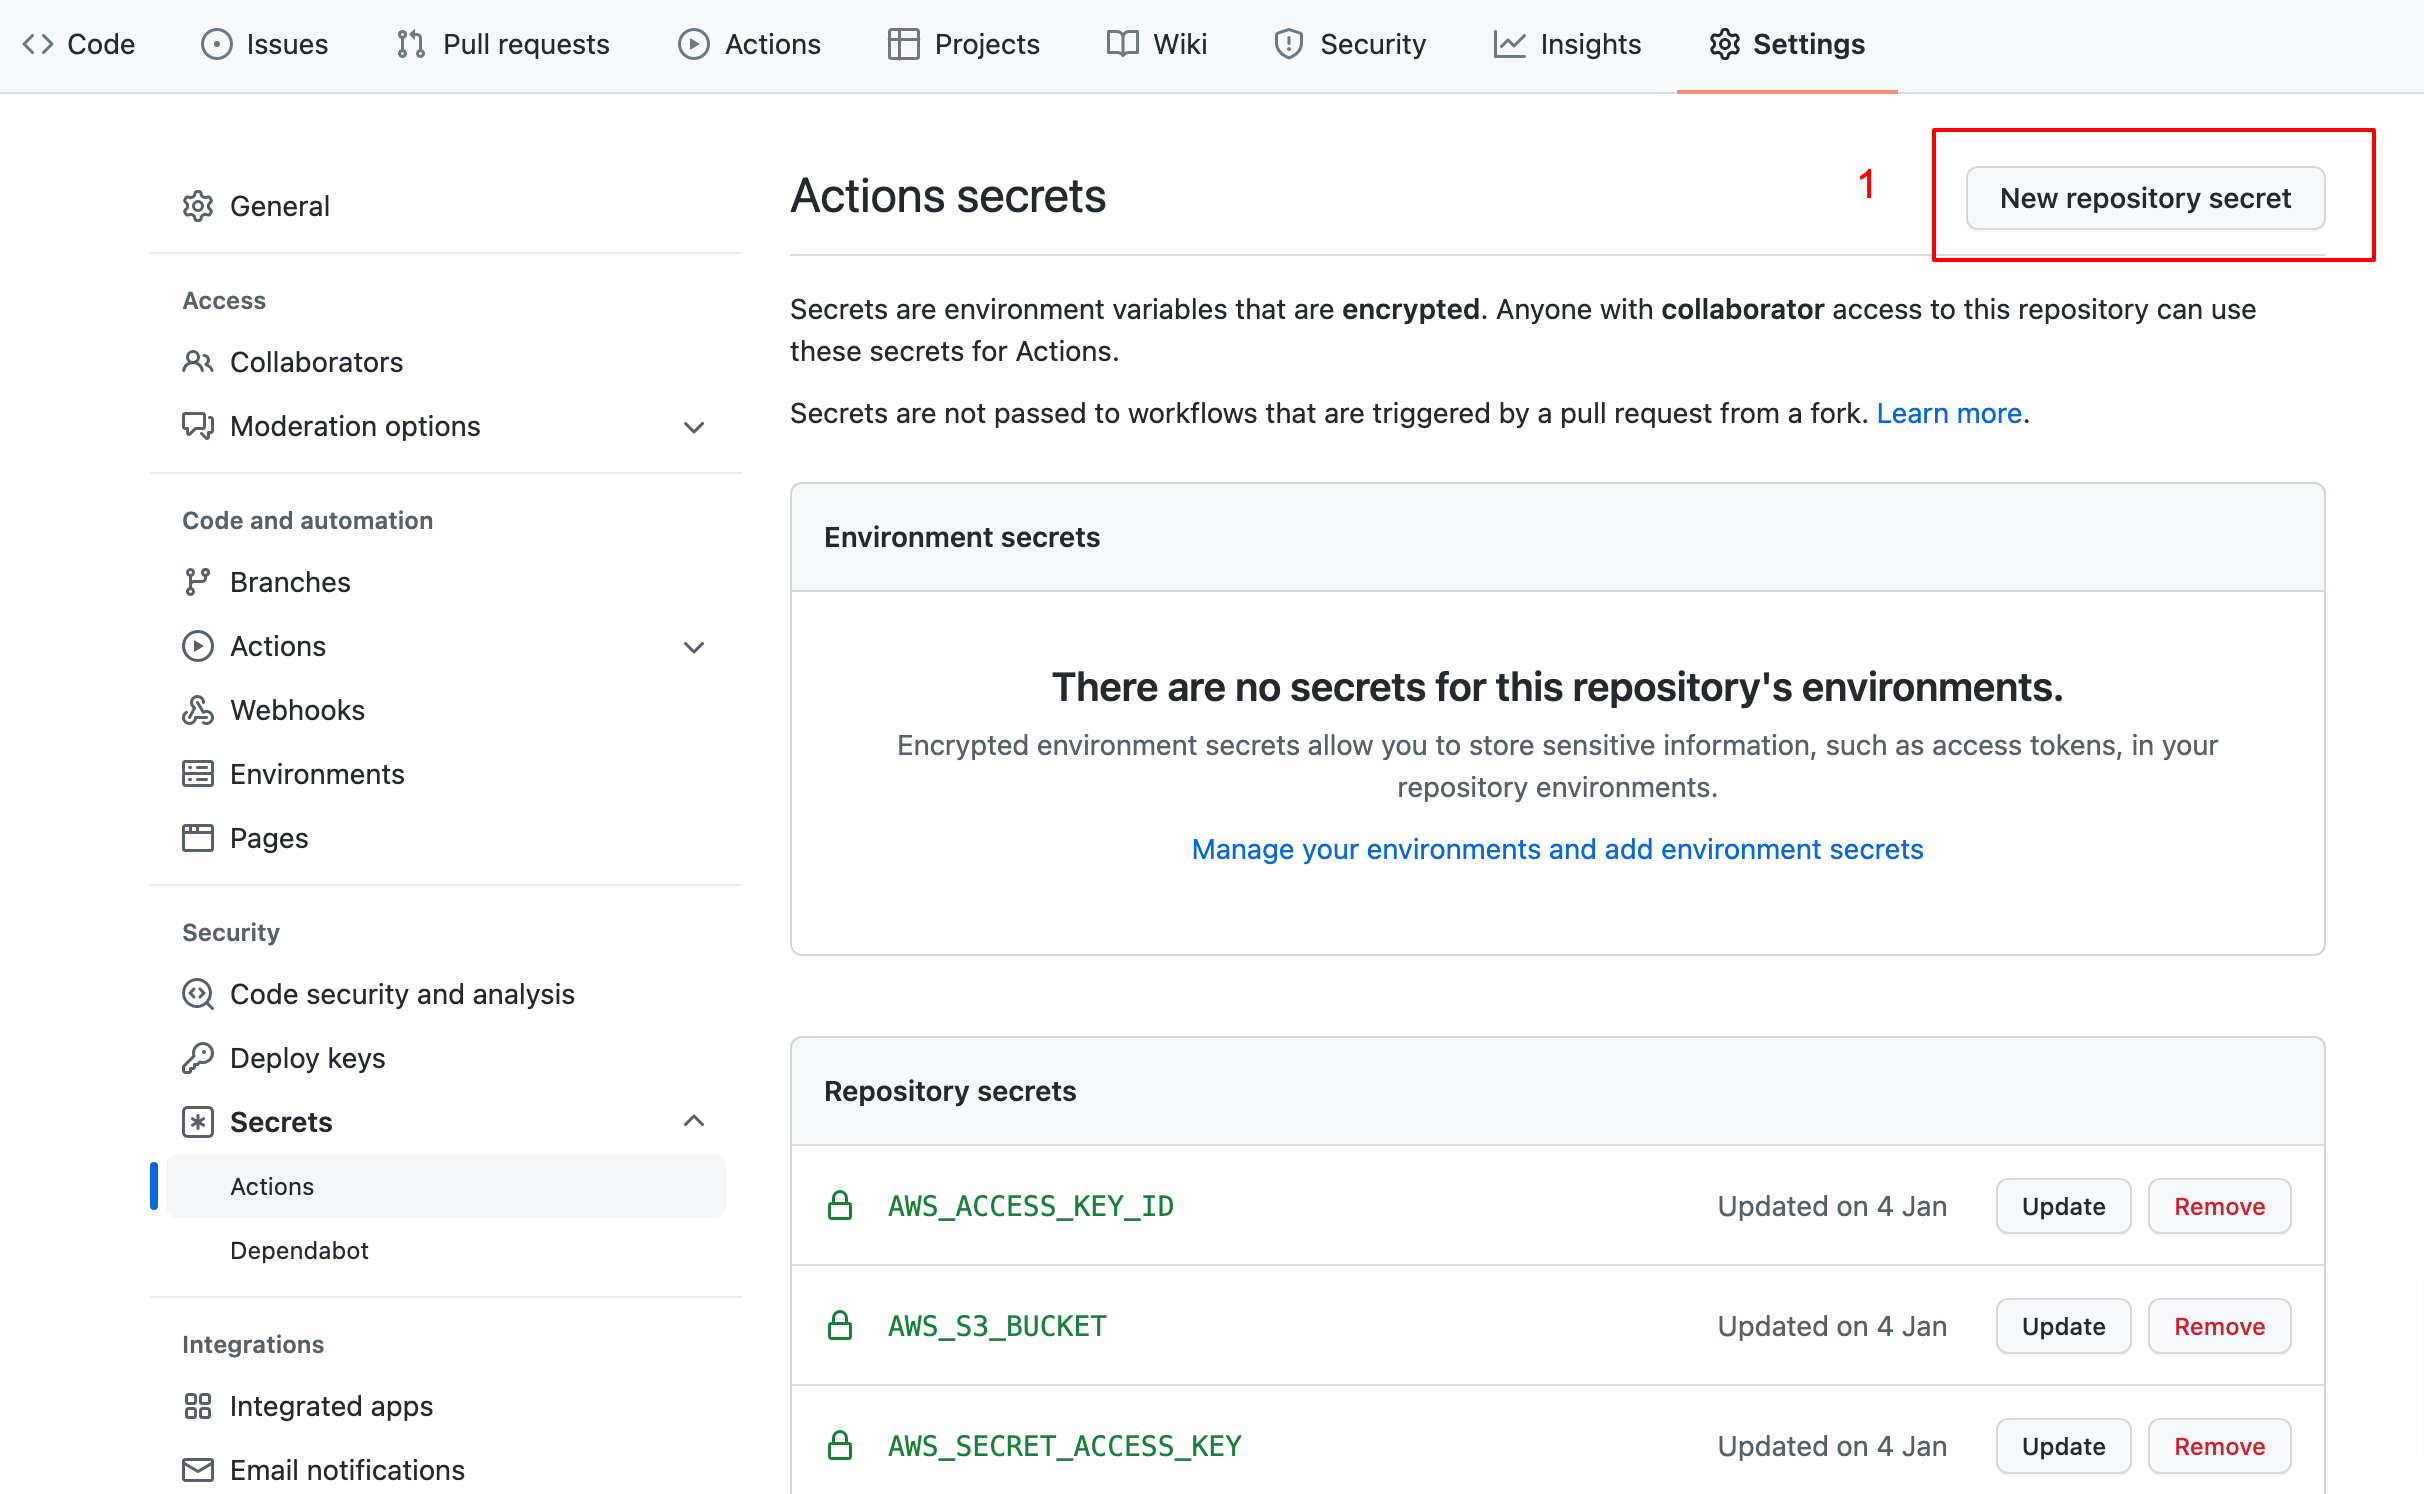
- Login to your github and open the repo
- Go to repo settings -> Secrets -> Actions
-
Add three secrets
Name Value AWS_S3_BUCKET Your S3 bucket name
Ex: examplesitebucketAWS_ACCESS_KEY_ID Access ID Of AWS IAM User AWS_SECRET_ACCESS_KEY Access Key Of AWS IAM User -
Now let's test
If you followed the above steps properly, we are done with setting up ci/cd pipeline.
Now its time to test it
You can commit the changes in your Github repo and push to master branch
On push to master branch our workflow Github action will trigger and which will deploy our code into S3
Hope you like the blog.
Enjoy!!!